Once your Spring Boot application is ready for deployment, you’ll have to find an environment to deploy to. Over the past years, Kubernetes has evolved and gained a lot of attention. Today it is usually picked if you need service discovery, resource management, and autoscaling in addition to a convenient deployment model. Setting up your own Kubernets cluster on bare metal might be challenging and time-consuming. Fortunately, every major cloud provider (Google, Amazon, Microsoft …) offers a managed Kubernetes service ready to use in almost five minutes. To demonstrate how you can easily deploy your Spring Boot application to Kubernetes, I’ll be using GKE (Google Kubernetes Engine) in this blog post.
The following technologies are used for this demo: Java 11, Docker, Kubernetes 1.13.x, Spring Boot 2.3
Prerequisites for deploying your app to GKE
To follow the tutorial you need the following prerequisites:
- kubectl (Kubernetes CLI to manage a cluster)
- gcloud (Google Cloud SDK)
- a Google Cloud Account (free $ 300 trial)
Once you installed the CLI tools and set up a Google Cloud account, you can create a new project in the Google Cloud console. This project is used to partition your different services and application under a common name:

Google will automatically assign a unique ID for your project, which we’ll need later on for pushing the Docker image to GCR (Google Container Registry).
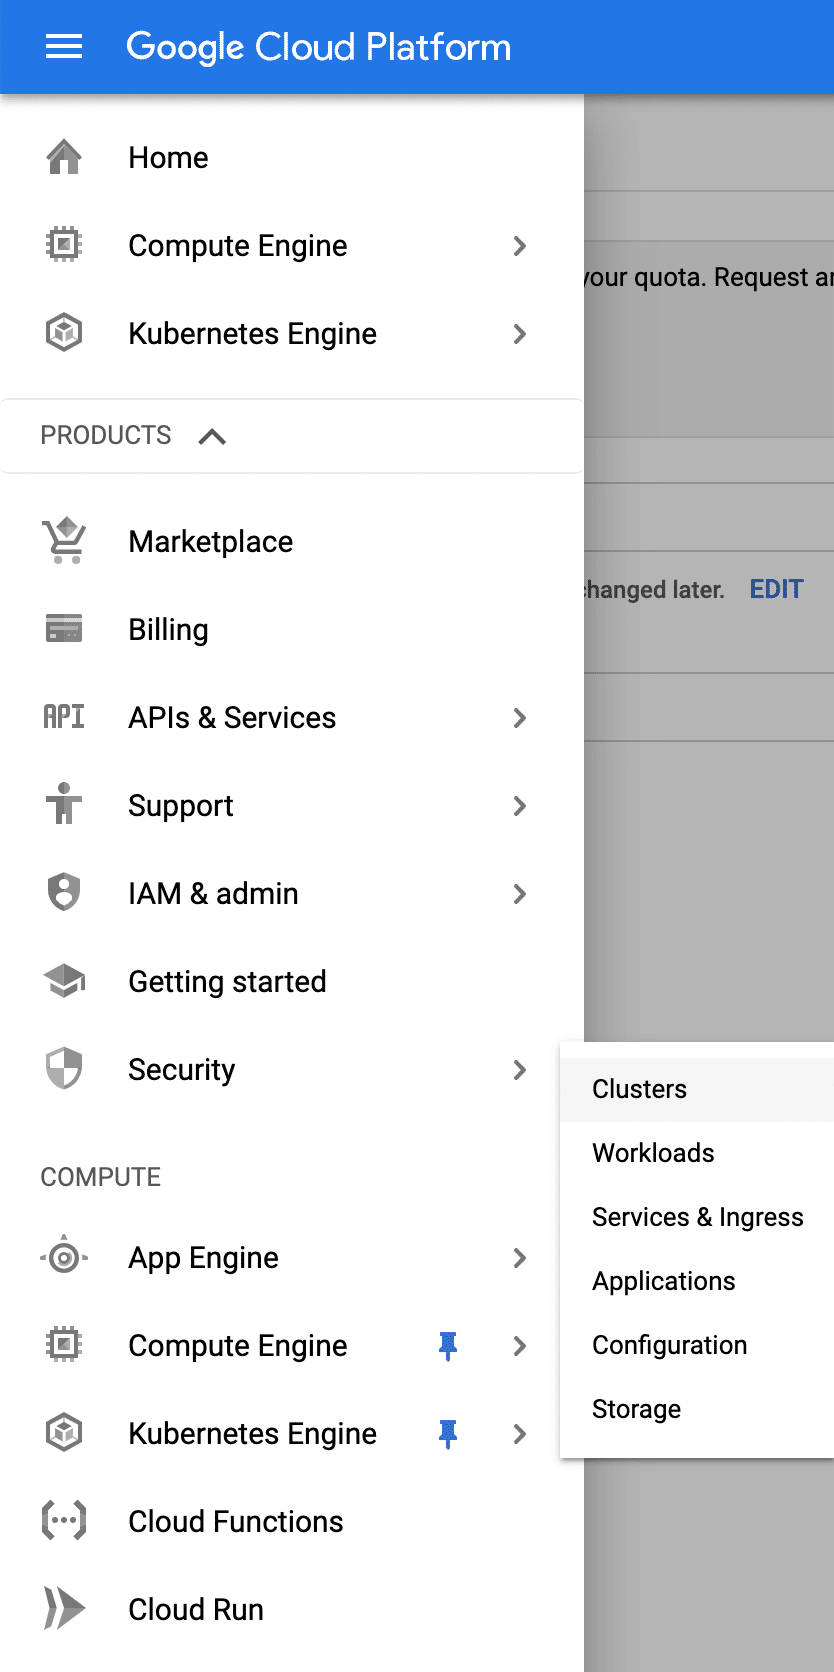
Next, you’ll have to create your first Kubernetes cluster. You can use either the web console for this or the gcloud CLI. To create the cluster in your browser, open the left-side menu and navigate to Kubernetes Engine -> Clusters:

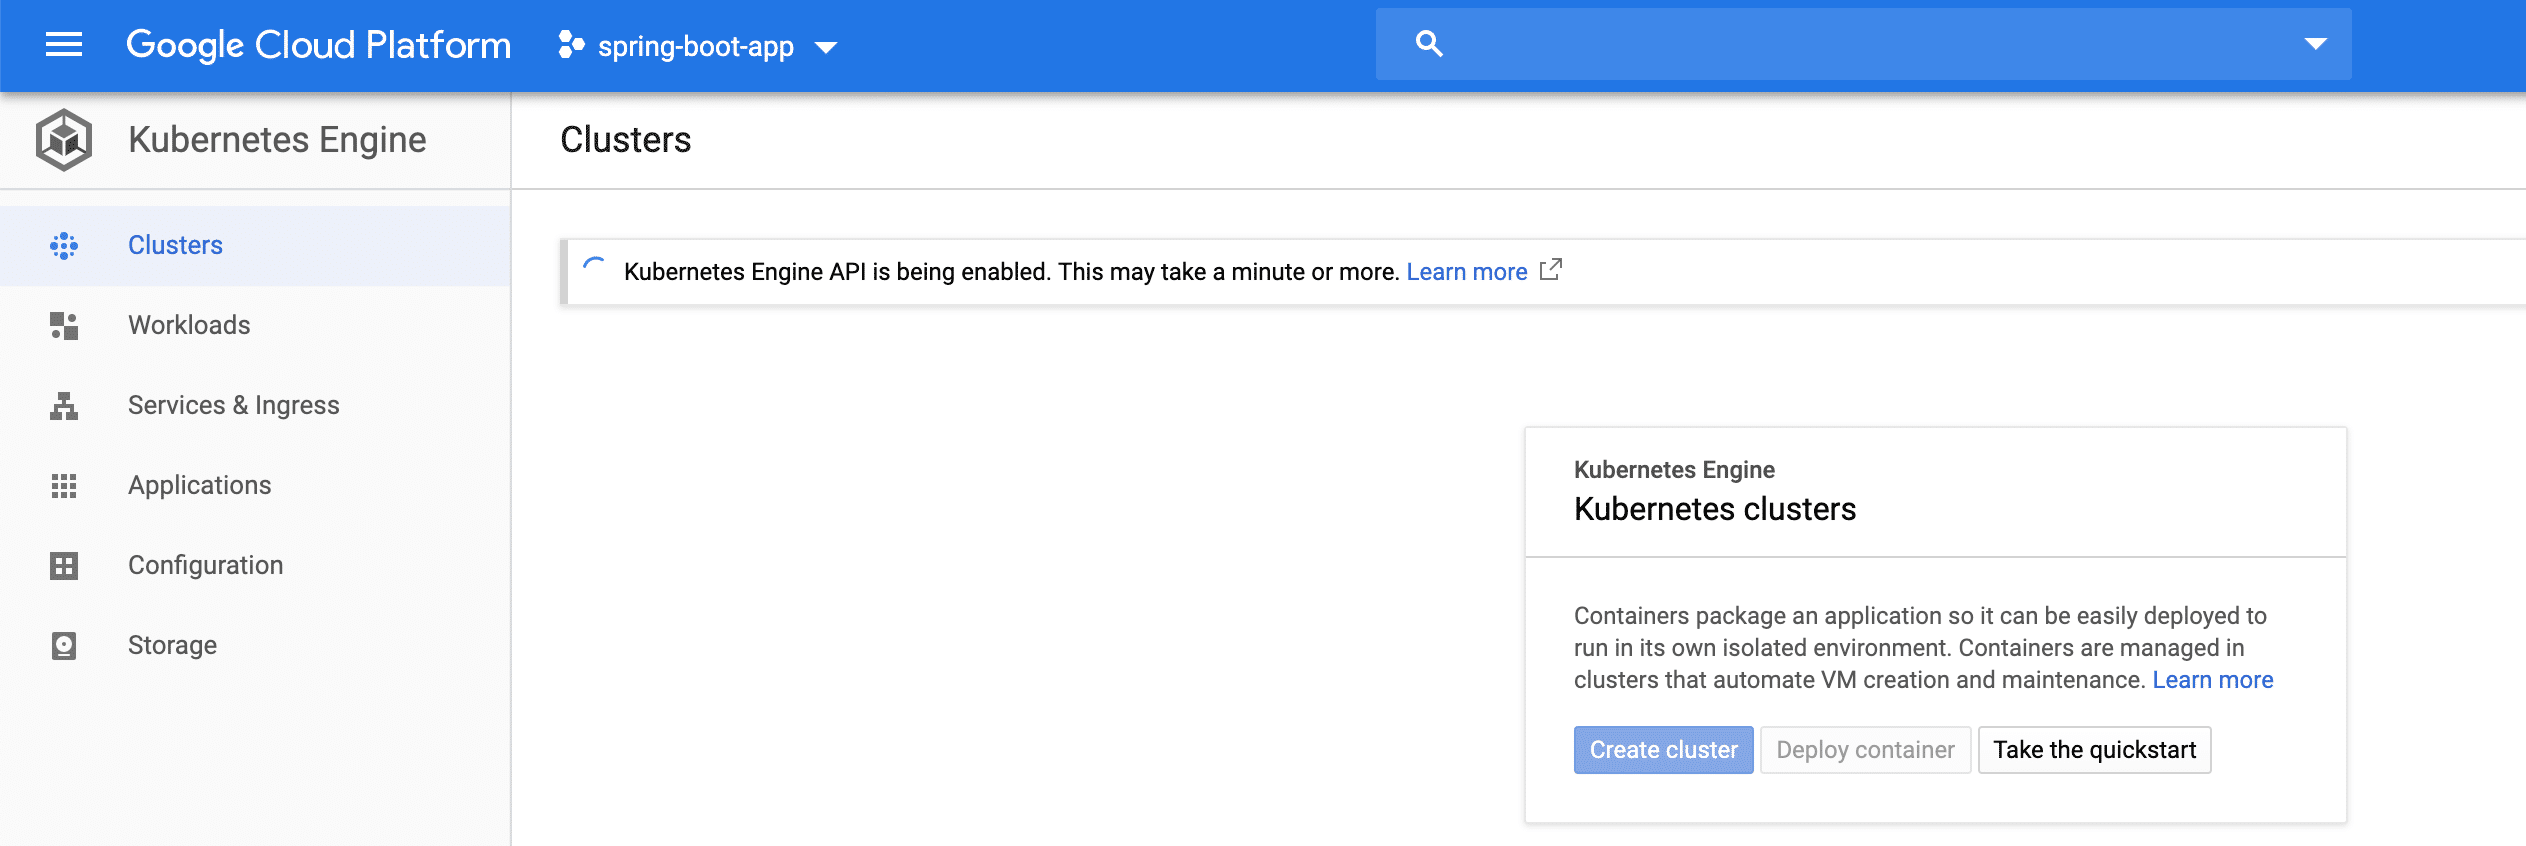
If you’ve just created a new Google Cloud project, Google might need some minutes to enable the Kubernetes API for this project. Once it’s enabled, you can create a new cluster:

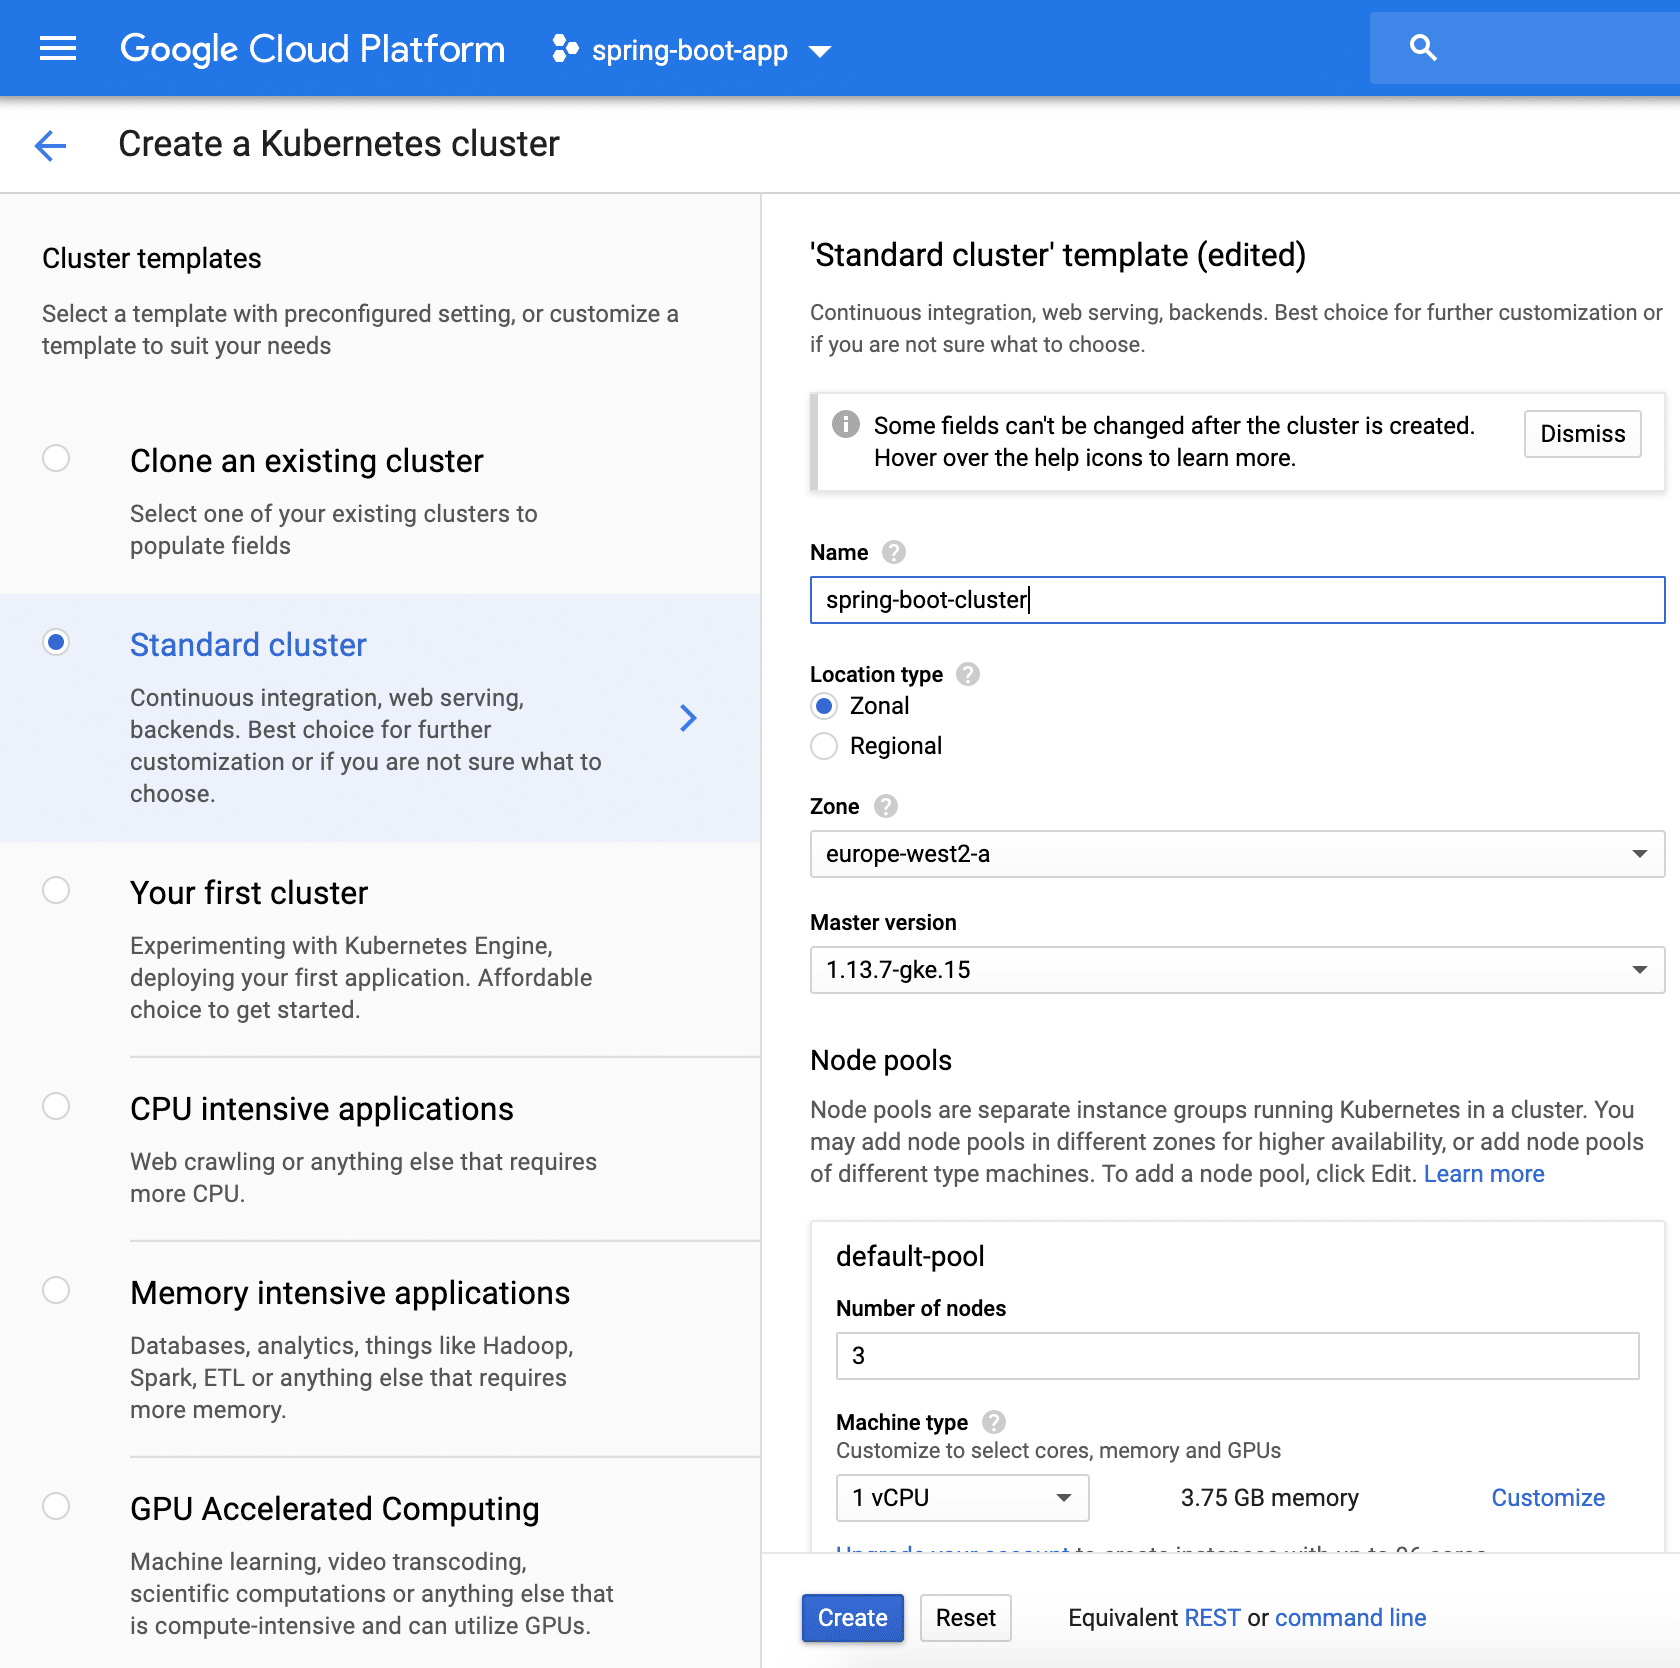
For simplicity, you can choose the Standard cluster template from Google to configure your Kubernetes cluster. In addition, you can rename the cluster, select a specific region and the Kubernetes version. Leave the other configuration options as the pre-configured values are fine for a first demo:

Once you click on Create, Google will allocate the required machines and set up the cluster. This might takes some minutes and we can continue with the preparation of the Spring Boot application.
Prepare the Spring Boot application for a Kubernetes deployment
The sample Spring Boot application contains one REST endpoint to send a message over the wire:
|
1 2 3 4 5 6 7 8 9 10 11 12 |
@RestController @RequestMapping("/hello") public class HelloWorldController { @Value("${message}") private String message; @GetMapping public ResponseEntity<String> getMessage() { return ResponseEntity.ok(message); } } |
The actual message gets injected and will be defined as an environment variable in the Kubernetes Pod specification. You can use this approach to configure any plain-text variable (e.g. stage, JDBC URL, feature toggles, etc.). In addition to the REST endpoint, I’ve added the Spring Boot Actuator dependency and enabled just the health endpoint:
|
1 2 |
management.endpoints.enabled-by-default=false management.endpoint.health.enabled=true |
We’ll use the /actuator/health endpoint, later on, to configure liveness and readiness probes for the application. This will ensure that Kubernetes won’t send traffic unless the application is ready. Furthermore, Kubernetes will monitor the liveness of the application and terminate the pod if the application is unhealthy and create a new one.
That’s everything required from the code perspective. As we’ll use Docker as the container engine, we need to create a Docker image containing the application. For this, I’ve used a straightforward Java 11 Dockerfile:
|
1 2 3 4 |
FROM openjdk:11-jdk VOLUME /tmp COPY target/deploy-spring-boot-to-gke.jar app.jar ENTRYPOINT ["java","-Djava.security.egd=file:/dev/./urandom","-jar","/app.jar"] |
The actual Kubernets Deployment object is defined in a .yaml file and contains the following configuration:
|
1 2 3 4 5 6 7 8 9 10 11 12 13 14 15 16 17 18 19 20 21 22 23 24 25 26 27 28 29 30 31 32 33 34 35 36 37 38 |
apiVersion: apps/v1 kind: Deployment metadata: name: spring-boot-gke labels: app: spring-boot spec: selector: matchLabels: app: spring-boot replicas: 2 template: metadata: labels: app: spring-boot spec: containers: - name: spring-boot-gke image: eu.gcr.io/spring-boot-app-247617/spring-boot-gke:latest imagePullPolicy: Always readinessProbe: httpGet: port: 8080 path: /actuator/health initialDelaySeconds: 5 livenessProbe: httpGet: port: 8080 path: /actuator/health initialDelaySeconds: 5 ports: - containerPort: 8080 env: - name: message valueFrom: configMapKeyRef: name: message-config key: message |
This excerpt defines how the application is going to be deployed within the cluster. We’ll use two instances, expose the port 8080, configure which Docker image to use, define the liveness and readiness probe HTTP endpoint and inject the message value. This is achieved with a Kubernetes ConfigMap:
|
1 2 3 4 5 6 |
apiVersion: v1 kind: ConfigMap metadata: name: message-config data: message: Hello World from GKE! |
To access the application from outside the cluster, we’ll have to create a so-called Kubernetes Service. This is will expose the application on a pre-defined port. There are several types of Services and for this example, I’ve picked the LoadBalancer:
|
1 2 3 4 5 6 7 8 9 10 11 12 |
apiVersion: v1 kind: Service metadata: name: spring-boot-gke spec: selector: app: spring-boot ports: - port: 80 targetPort: 8080 protocol: TCP type: LoadBalancer |
This will later on delegate the Google Cloud to create a load balancer with a public IP address. All of these Kubernetes objects are stored within a single deployment.yaml file and each object is delimited by ---.
Deploy the application to GKE
Once the application is ready, we can build the app and Docker image.
|
1 2 3 |
mvn clean package docker build -t spring-boot-gke . docker tag spring-boot-gke eu.gcr.io/spring-boot-app-247617/spring-boot-gke |
To push the Docker image to the Google Container Registry, we have to tag it according to the following pattern reginalEcrHostname/projectId/dockerImageName:tag. For this, you’ll now need the unique project id and the region of your Kubernetes cluster (for the example it’s eu.gcr.io as we are running in Europe). In addition, we need authentication to push images to the GCR. This is achieved with a simple glcoud operation:
|
1 2 |
gcloud auth configure-docker docker push eu.gcr.io/spring-boot-app-247617/spring-boot-gke |
Accessing the Kubernetes cluster in the cloud from your local machine requires configuration for your kubectl CLI. The Google Cloud Console provides you the required command once you select your Kubernetes cluster and click on the button Connect.
As soon as you configured your kubectl cluster context with the gcloud command, you can deploy the application to the cluster with a single Kubernetes command:
|
1 2 |
gcloud container clusters get-credentials spring-boot-cluster --zone europe-west2-a --project spring-boot-app-247617 kubectl apply -f deployment.yaml |
Afterward, you can check if the two pods (instances) are up and running:
|
1 2 3 4 5 |
$ kubectl get pods NAME READY STATUS RESTARTS AGE spring-boot-gke-669545b694-cmdzr 1/1 Running 0 47s spring-boot-gke-669545b694-gg8vg 1/1 Running 0 47s |
You’ll get the public IP address if you query for all available services. Assigning the IP address might take some minutes
|
1 2 3 4 5 |
$ kubectl get service NAME TYPE CLUSTER-IP EXTERNAL-IP PORT(S) AGE kubernetes ClusterIP 10.0.0.1 <none> 443/TCP 4m35s spring-boot-gke LoadBalancer 10.0.12.53 35.242.179.139 80:30547/TCP 64s |
For this example, the application is now available at http://35.242.179.139/hello and returns the following output:

That’s everything!
You can find the whole codebase on GitHub.
Looking for further Kubernetes related blog posts?
Have fun deploying your Spring Boot apps to GKE,
Phil

